
So, I've been having trouble sleeping lately, and that usually ends up being the time that I browse craft blogs, sewing sites, etc. I was recently directed to this site:
http://www.allfreesewing.com/
It has a lot of projects, tips, tricks, and techniques on it, and it's all FREE. So, I browsed around and came across a few smocking tutorials. I love the look of smocked fabric, it makes wonderful children's clothing. I know a few fabric stores sell already smocked fabric by the yard. However, with these wonderful tutorials, I know I will not be paying for smocked fabric anymore!
Onto the smocking.
The first one I'm going to share with you is called knot smocking. It is done by machine, and works up really quickly. I haven't tried this one yet, so I don't have any personal photos. She includes a video, which is really helpful for all you visual learners!
http://grosgrainfabulous.blogspot.com/2010/11/technique-tuesday-knot-smocking.html
I could see myself using this technique on pillows, or even a cape for a Halloween costume.
Next up, is the smocking that you see on the bolts in the fabric stores. It's also known as shirring. I have not attempted this one yet either, as we have been snowed in and I have no elastic thread on hand. It seems really simple though! This would be perfect for those summer dresses.
http://www.rufflesandstuff.com/2010/02/shirring-tutorial.html
The next two are done by hand, require some patience, but they do not take long to work up. I've tried both of these, and really like the result. The best part about all of these smocking techniques? They do not require pleats!!
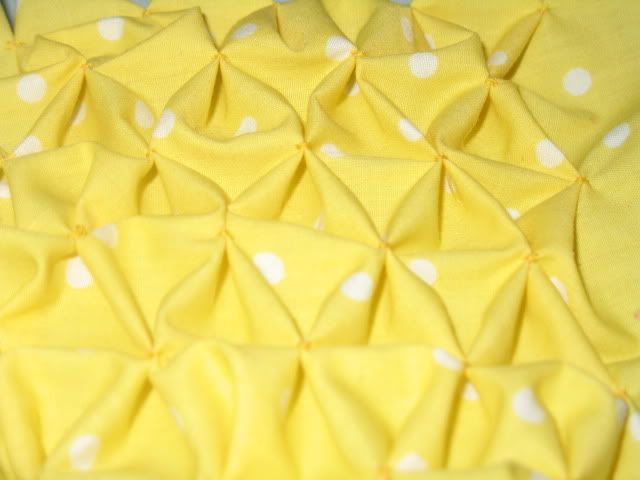
First up, the honeycomb smocking technique.
http://katafalk.wordpress.com/2010/02/05/honeycomb-smocking-tutorial/
And here is my little swatch, which took me maybe 30 minutes:
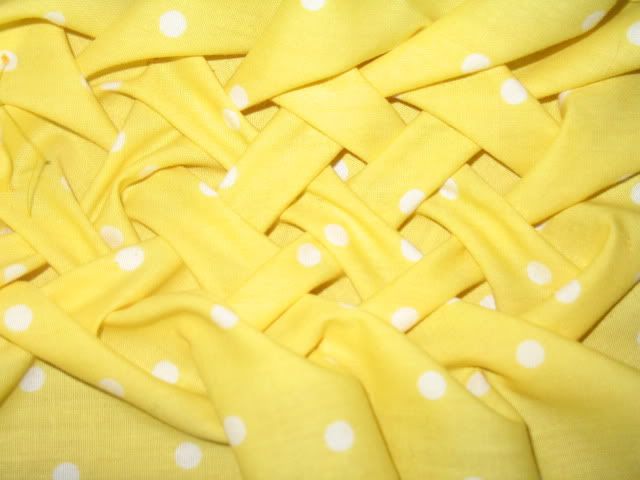
The second hand smocking technique comes from that same site, and it's called lattice smocking. It requires a bit more patience, and is a little more complicated, but the end result is beautiful!!
http://katafalk.wordpress.com/2010/02/20/lattice-smocking/
And here is my little swatch, which took me slightly longer:
Hopefully, you'll give smocking a try, and add some fun texture to your projects!