Ok, as promised, here is the how-to on the foot warmer inserts. I didn't do pictures with this one, as it is fairly simple. If anyone wants pictures, let me know, and I will gladly take some.
What you'll need:
4 7"x14" pieces of muslin
2 lbs of rice
A wide mouth funnel(this makes transferring the rice into the bag really easy, but you don't have to have this)
Place two pieces of muslin right sides together, and sew 1/4" - 1/2" away from edge on the two long sides, and one of the short sides. Turn right side out, and press down the opening about 1/4"-1/2". This will make sewing it shut a lot easier!
Pour 1 lb of rice into the bag and shake it all to the bottom. Sew opening closed.
Repeat with remaining muslin and rice. These should fit nicely into the pockets of your foot warmer cover.

Monday, November 22, 2010
Saturday, November 20, 2010
Rice Pack Foot Warmers tutorial
Ok, my attempt at a second tutorial. Let's hope it's clear and makes sense. I'm writing this on little sleep, so bear with me. :) This is for the cover only, I'll do another tutorial on the rice packs when I make them.
First, you'll need:
2 15"x14" pieces of fleece or other soft material
1 15"x8" piece of fleece or other soft material
17" of bias tape, matching or contrasting

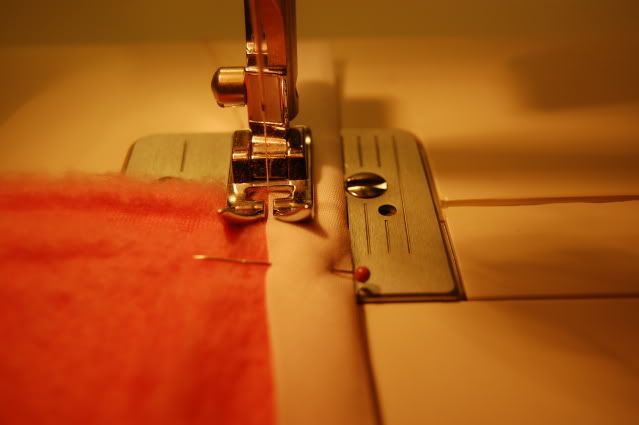
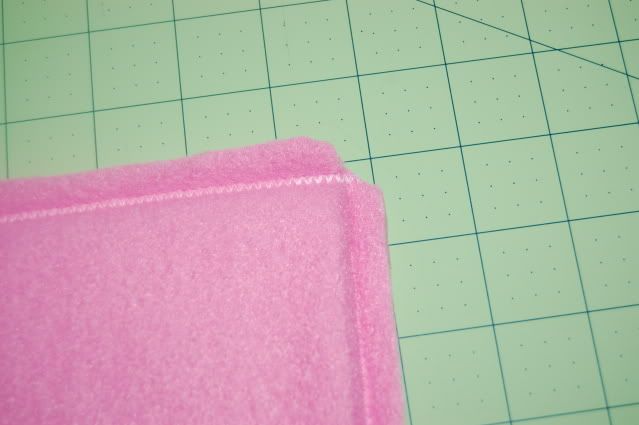
Zig zag stitch along the edge, making sure to catch both sides of the bias tape.
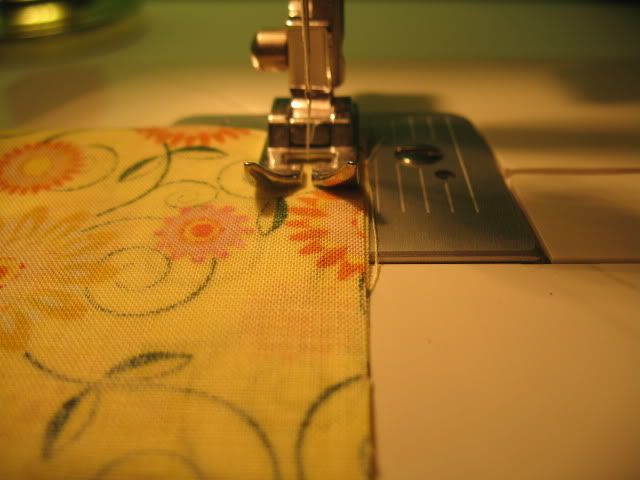
Set aside, and grab one of the 15"x14" pieces. Pin up a hem of 1" along one of the longer sides. Sew using straight or zig-zag. You don't have to add a hem here if using fleece or another material that won't fray. I just do, because these were gifts.
Do the same for the other piece.
Next, stack the layers in this order:
15x14 piece right side up
15x8 piece right side down
15x14 piece right side down
Line up the hems and stitch around the 2 sides, and top using a 1/2" seam allowance or larger. I used approximately an inch on this one. You can also serge the edges if you have one. I do, but for this tutorial's sake, I didn't use it.
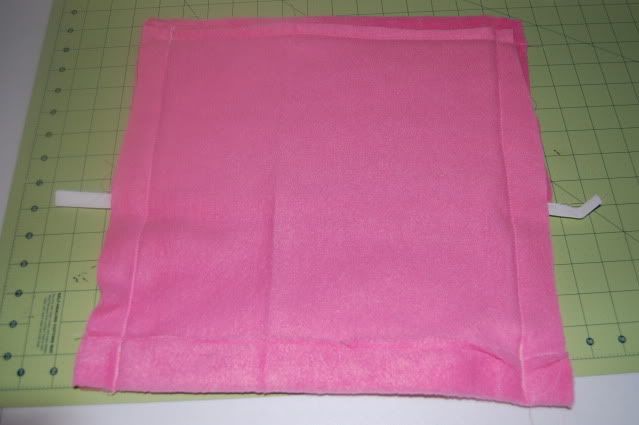
Then, trim close to the stitching, and clip your corners.
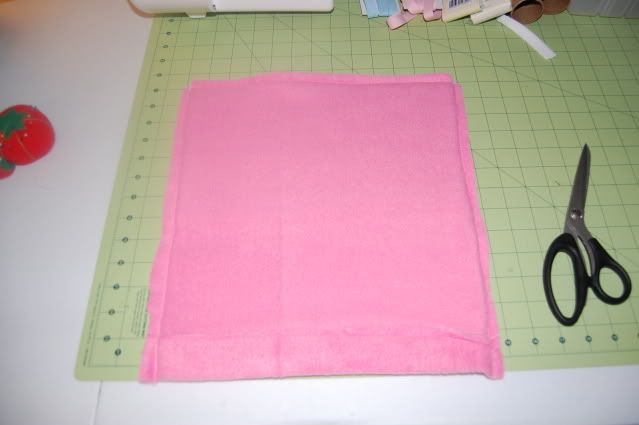
Turn right side out. It should now look something like this:

Fold in half lengthwise, and mark the center. Set machine to straight stitch, and sew through all layer down the middle. You'll create two pockets for the rice packs.
Finished:

Hope you can follow that easily enough, and if not, feel free to ask any questions! You can also make them different sizes, depending on how big/small the person's feet is.
Also, this is my own design so please just give credit where credit is due. That is all. :)
First, you'll need:
2 15"x14" pieces of fleece or other soft material
1 15"x8" piece of fleece or other soft material
17" of bias tape, matching or contrasting
(Please ignore the mess that is my craft table. I'm in the middle of a lot of Christmas gifts.)
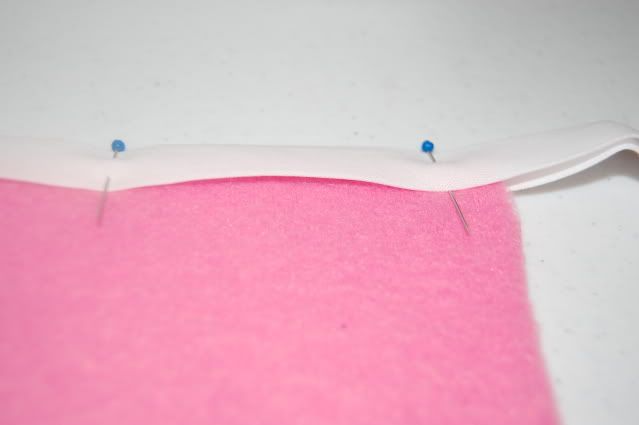
First, pin the bias tape on the long side of the 15"x8" piece of material.
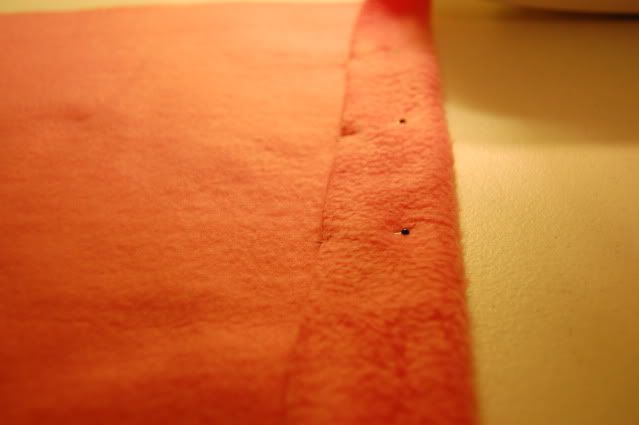
Set aside, and grab one of the 15"x14" pieces. Pin up a hem of 1" along one of the longer sides. Sew using straight or zig-zag. You don't have to add a hem here if using fleece or another material that won't fray. I just do, because these were gifts.
Do the same for the other piece.
Next, stack the layers in this order:
15x14 piece right side up
15x8 piece right side down
15x14 piece right side down
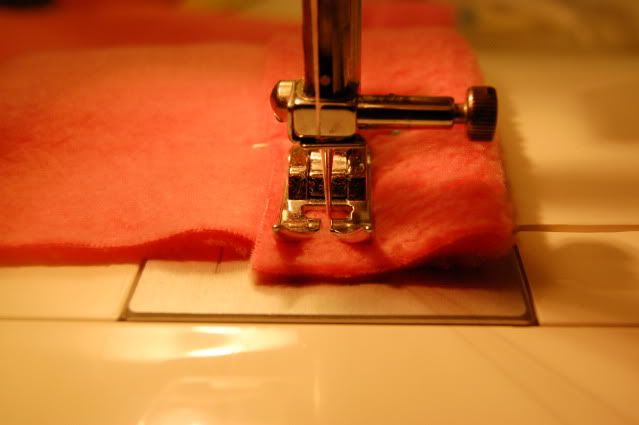
Line up the hems and stitch around the 2 sides, and top using a 1/2" seam allowance or larger. I used approximately an inch on this one. You can also serge the edges if you have one. I do, but for this tutorial's sake, I didn't use it.
Then, trim close to the stitching, and clip your corners.
Turn right side out. It should now look something like this:
Fold in half lengthwise, and mark the center. Set machine to straight stitch, and sew through all layer down the middle. You'll create two pockets for the rice packs.
Finished:
Hope you can follow that easily enough, and if not, feel free to ask any questions! You can also make them different sizes, depending on how big/small the person's feet is.
Also, this is my own design so please just give credit where credit is due. That is all. :)
Friday, November 5, 2010
Crayon roll tutorial
Bear with me, as this is the first sewing tutorial I've ever written, and I'm not the greatest at sewing, especially straight lines. I'll try to be as clear as possible, but if you have any questions, please feel free to comment below.
*deep breath* Here goes nothing!
I was searching around on some crafting blogs, and stumbled upon a tutorial for crayon rolls. What a cute idea I thought, and decided to make some for my nephews for Christmas. However, I wanted to do the jumbo crayons, and could only find a tutorial for the skinny crayons. Another road block was that most tutorials were for 16 count crayons, and I only needed 8. So, I measured my crayons, and went from there.
What you'll need:
2 10"x10" piece of fabric
1 6"x10" piece of fabric
30" of ribbon
1 pack of Jumbo crayons, 8 count.
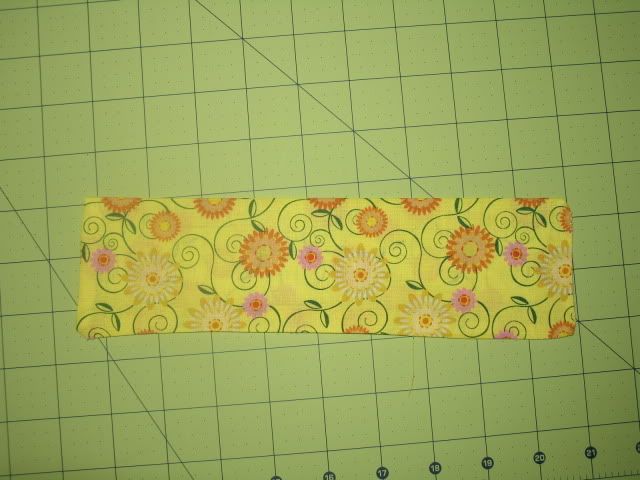
First, cut out the fabric. I used fat quarters for this, since I bought them on clearance at Walmart for $1 a piece.

 Pin to one of the 10" by 10" squares on the right side of the fabric with the folded edge towards the top and sew along the edges.


Cut a 30" piece of ribbon, and fold it in half. Mark this point and use it as the spot to attach it to the roll. Attach on the back side of the piece, on the last seam of the crayon pockets.
No picture available yet. I will take one and upload it, as soon as I can.
Insert your crayons, and fold down the top, roll it up, and tie it. :)
Here is a rolled one, but it's a different fabric. It was my first try at making a crayon roll.

I hope this isn't too confusing. I will try my best to answer any questions you may have.
*deep breath* Here goes nothing!
I was searching around on some crafting blogs, and stumbled upon a tutorial for crayon rolls. What a cute idea I thought, and decided to make some for my nephews for Christmas. However, I wanted to do the jumbo crayons, and could only find a tutorial for the skinny crayons. Another road block was that most tutorials were for 16 count crayons, and I only needed 8. So, I measured my crayons, and went from there.
What you'll need:
2 10"x10" piece of fabric
1 6"x10" piece of fabric
30" of ribbon
1 pack of Jumbo crayons, 8 count.
First, cut out the fabric. I used fat quarters for this, since I bought them on clearance at Walmart for $1 a piece.
Fold your 6" piece of fabric in half, length-wise and right sides together, and press. This will form the pocket for the crayons.
I don't know the exact seam allowance on this. I just lined my presser foot up with the edge of the fabric and followed that.
Sew the two short edges together, and along the bottom, leaving an opening for turning. Clip your corners, turn right side out, and press again.
It will be shorter than the 10x10 piece of fabric, so try to get it in the middle. Sew down one short side, across the bottom, and up the other short side. This will close the hole left from turning the pocket.
Lay the other piece of 10"x10" fabric right side down on top of the piece with the pocket. Pin together, and sew around the edges, leaving an opening to turn right side out. Clip corners, turn right side out, and press. Top stitch around the outside starting just above the pocket on one side, and stopping at the top of the pocket on the other side, about 1/4" from the edge.
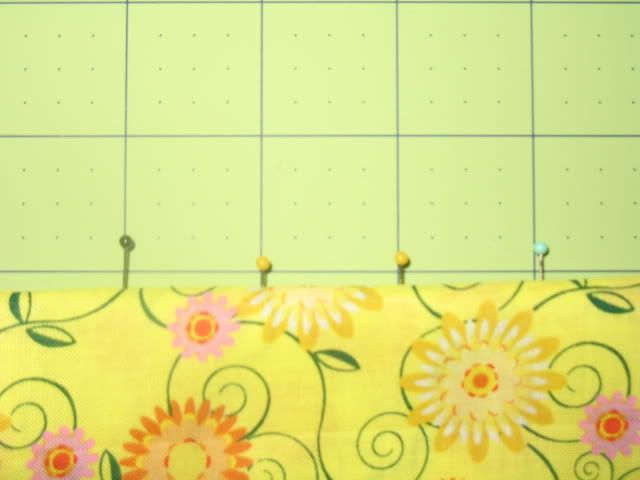
Mark pocket at 1" increments and place a pin at each spot. Sew a straight line from the top of the pocket to the bottom. Repeat until all 8 crayon pockets are created.
Cut a 30" piece of ribbon, and fold it in half. Mark this point and use it as the spot to attach it to the roll. Attach on the back side of the piece, on the last seam of the crayon pockets.
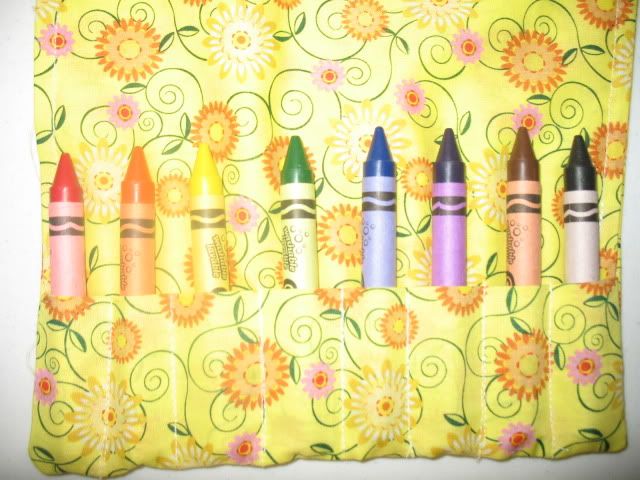
Insert your crayons, and fold down the top, roll it up, and tie it. :)
Here is a rolled one, but it's a different fabric. It was my first try at making a crayon roll.
I hope this isn't too confusing. I will try my best to answer any questions you may have.
Thursday, November 4, 2010
Homemade Apple Butter
Apple butter is a treat around here, and such a family fave! I make some every year, and people always request it. What they don't realize is how easy it is to make.
What you'll need:
3 large jars of unsweetened applesauce
3 cups of sugar
2-3 tablespoons of ground cinnamon
1 teaspoon each of ground nutmeg, ground cloves, and allspice
a large crockpot, mine is 5 quarts.
Combine all ingredients in your crockpot, and stir well to combine. Cook on low overnight, or at least 8 hours, stirring occassionally. Vent lid, and allow to cook another 3-4 hours, or until thickened. Then can and enjoy.
I can by boiling in water. It's really easy too.
Wash all of the jars, lids, and rings, and then boil them for 10 minutes to sterilize them. Fill them up to the bottom of the threads, and then put the lids and rings on and boil the jars for 20 minutes in a large stock pot. Remove from the stockpot, and let cool on the counter. As the jars seal, you'll hear a pop.
Friday, October 29, 2010
Homemade Holiday gifts
Homemade/handmade gifts are a big thing in my family. I try to make the majority of our gifts, and am always looking for new ideas. I thought I'd share a few of them here, for anyone else looking to do the same.
An easy, cheap, and quick gift idea is the jar gift. You spend a bit on ingredients, but you can make several of these for really cheap. Add a cute scrap of fabric and some ribbon with the instructions, and you have a cute and useful gift. You can find recipes and ideas here:
http://www.budget101.com/frugal/jar-gift-mixes-190/
Perhaps you want to give a bath set, but don't want to waste your money on the store bought stuff that generally sits untouched. Try this site for a few ideas:
http://www.freebathrecipes.com/
If you can crochet, a simple hand towel and some matching yarn can give you a quick housewarming gift in the form of a hanging hand towel. I have several of these in my kitchen, and absolutely love them! Patterns can be found here:
http://www.crochetpatterncentral.com/directory/towel_toppers.php
You can also make a few matching potholders if you use cotton yarn.
http://www.crochetpatterncentral.com/directory/potholders_etc.php
Speaking of hand towels, you can buy a set of solid colored ones, find some matching ribbon, and sew it onto the towel for some quick, decorative hand towels.
http://needlesfabricandthread.blogspot.com/2009/02/it-went-from-plain-to-darn-cute.html
And one more that I forgot to add the first time around:
Potpourri lighted jars. You just take a large mason jar, a bag of potpourri, and a small strand of lights(no more than 50.) You put the lights in the jar, and leave enough out so you can plug it in, and then pour the potpourri on top. Cover the top with some decorative lace fabric and tie with a ribbon and it makes a great gift. You can get potpourri and lights at the dollar store.
http://www.allfreecrafts.com/giftinajar/litjars.shtml
The possibilities are endless, and you don't have to be Martha Stewart to put these together! I hope you find something useful within those links!
Wednesday, October 27, 2010
Re-purposing things!
So, I've really been into re-purposing things lately.
My husband's grandfather gave me two medium men's t-shirts that he couldn't wear, and neither could I. So, I browsed around on a few of the craft blogs that I follow, and came across this:
http://www.rookiemoms.com/make-some-easy-kids-pants/
I thought it was an absolutely genius idea, so I set to work on it.
However, since my oldest daughter is almost 3, a medium shirt would only provide enough length for a pair of capris. It took me at most, 30 minutes from cut to finish.
Here is the only picture I have of her in them, it's a terrible cell phone picture:

I also re-purposed an old tank top into a cute baby's hat:
 by following this tutorial:
http://www.rookiemoms.com/sew-a-quick-newborn-hat-from-a-t-shirt/
So, hop on over to rookiemoms.com and find a craft for you, or your little one! :)
My husband's grandfather gave me two medium men's t-shirts that he couldn't wear, and neither could I. So, I browsed around on a few of the craft blogs that I follow, and came across this:
http://www.rookiemoms.com/make-some-easy-kids-pants/
I thought it was an absolutely genius idea, so I set to work on it.
However, since my oldest daughter is almost 3, a medium shirt would only provide enough length for a pair of capris. It took me at most, 30 minutes from cut to finish.
Here is the only picture I have of her in them, it's a terrible cell phone picture:
I also re-purposed an old tank top into a cute baby's hat:
http://www.rookiemoms.com/sew-a-quick-newborn-hat-from-a-t-shirt/
So, hop on over to rookiemoms.com and find a craft for you, or your little one! :)
Monday, August 30, 2010
Make your own diaper pail deodorizer!!
I was browsing around online for things to combat diaper pail stink. I came across a lot of little disks that you throw into your pail, and these are simple enough to make, however, I need something I can throw together quickly and not have to wait for drying time.
So, I came up with this simple recipe. It's not really anything new, and I know I'm not the first to do it.
You'll need:
Simply dump the entire box of baking soda into your bowl. Put on your gloves, and add 5 drops of your fragrance oil and mix until there are no clumps. This can take a while, but it's really important that you mix thoroughly. I run my fingers through it, and as the clumps come through, I break them up. If you feel the fragrance isn't strong enough, you may add another 3-4 drops, but you don't want to add too much!
Transfer the mixture into your bottle, and sprinkle into your diaper pail. Many moms recommend sprinkling the bottom and then again when the pail is half full.
This also makes a wonderful carpet deodorizer. Simply sprinkle onto your carpet, let sit for 30 minutes and vacuum up! This is what I do with any leftover sprinkles that won't fit into my bottle. I need to get an extra bottle. :)
So, I came up with this simple recipe. It's not really anything new, and I know I'm not the first to do it.
You'll need:
- 1 box of baking soda
- 1 bottle of your favorite fragrance oil or essential oil(You can pick these up at most craft stores in the soap making section for around $3 a bottle, which will go a long way since you are only using drops at a time)
- 1 bowl to mix in, you'll want to use a bowl that you don't use for food preparation
- Gloves to protect your skin, as some fragrance oils can burn skin if in direct contact.
- 1 empty bottle with a shaker top - I'm recycling and using an empty parmesan cheese container, but an empty spice jar would work too as long as it's large enough.
Simply dump the entire box of baking soda into your bowl. Put on your gloves, and add 5 drops of your fragrance oil and mix until there are no clumps. This can take a while, but it's really important that you mix thoroughly. I run my fingers through it, and as the clumps come through, I break them up. If you feel the fragrance isn't strong enough, you may add another 3-4 drops, but you don't want to add too much!
Transfer the mixture into your bottle, and sprinkle into your diaper pail. Many moms recommend sprinkling the bottom and then again when the pail is half full.
This also makes a wonderful carpet deodorizer. Simply sprinkle onto your carpet, let sit for 30 minutes and vacuum up! This is what I do with any leftover sprinkles that won't fit into my bottle. I need to get an extra bottle. :)
Wednesday, August 25, 2010
Natural Laundry
This post is more for my own personal use, so I can keep everything in one place. :) Blogging it seemed to make more sense.
Since my husband and I decided to cloth diaper this baby, I started looking into all the do's and don'ts of washing cloth diapers. There seems to be a million ways to do things!
The wonderful ladies on BG(baby-gaga.com) directed me to this link:
http://talk.sheknows.com/f1002/cloth-diaper-detergent-711212/
It's a homemade laundry detergent that is safe for cloth diapers! I LOVE IT!! I'm on my second batch already, and it leaves my clothes so soft and fresh, and it's slowly fading some of those older stains. It took me a bit to get how much to use on my cloth diapers, but I think we have it now. I just add 1-3 scoops(depending on the soil level of the load) to a glass mason jar, add hot water, shake to dissolve, and then add it to the washing machine.
When I decided to switch to the homemade laundry detergent, I got rid of all the chemical additives for our laundry. This meant all fabric softeners, stain removers, and commercial detergents. I needed something to help soften clothes while drying, so I bought some PVC dryer balls from Walmart. I like how they lift and seperate my clothes, cutting my drying time down quite a bit. If I had a clothesline, I'd go that route, but sadly, I don't. Those same ladies turned me onto wool dryer balls. I was hesitant at first, because my husband is allergic to wool. However, he's had no reaction to them, and they are SO easy to make.
Here's the link to the tutorial I used to make them:
http://goodmama.typepad.com/goodmama/2008/05/make-your-own-wool-dryer-balls.html
I changed a few things, but the process is still the same. I wound them while watching tv. The yarn cost me $13 and I was able to make 6 dryer balls.
Since making this switch, I have noticed an improvement in my husband's dry/itchy skin. He no longer scratches like crazy. It's so nice, and I'm glad he's so much more comfortable!
Now that my laundry had gone green, I needed to do something about all that build-up in my washer. Yes, you need to clean your washing machine once in a while too!! I put it on the largest load setting, with the hottest water setting, and added 2 cups of vinegar. My fabric softener dispenser is in the middle of the agitator(I have a top loader) so I took it out and threw it down into the water. I left the lid up, and allowed it to soak for 30 minutes so the vinegar and hot water could dissolve the detergent build up. Then, I replaced the fabric softener dispenser, closed the lid and allowed it to get to the rinse cycle, but caught it before the washer could fill back up. I grabbed a sponge with a scrubber, and my vinegar/water spray bottle so I could scrub the agitator and make sure all of the buildup was removed. Then, I allowed it to finish it's rinse cycle. Even if you don't switch to natural laundry, you still need to run a hot cycle through your machine every once in a while to keep it performing optimally.
One last thing for my own notes, what to do when those cloth diapers start to stink even after washing. So, here is my prepping and stripping for my cloth diapers:
Prepping with my washer:
Hot wash/cold rinse- No Detergent
Hot wash/2 cold rinses - Detergent
Dry
Hot wash/cold rinse-no detergent
Hot wash/cold rinse-no detergent
Dry
Hot wash/2 cold rinse - detergent
Hot wash/cold rinse - no detergent
Dry
Stripping in my washer:
Cold wash/cold rinse - no detergent, but vinegar in the wash
Hot wash/cold rinse - no detergent, but a small squirt of Dawn in the wash
Hot wash/cold rinse - nothing added
Hot wash/cold rinse - nothing added
Hot wash/2 cold rinses - nothing added
I just kept running cycles until I didn't see any more suds in the rinse cycle.
And washing:
Cold wash/rinse - no detergent/vinegar in rinse
Hot wash/2 cold rinses - detergent
Extra cold rinse
Ok, now that I have my laundry info somewhat organized, I feel a bit better. :)
Tuesday, June 29, 2010
Cleaning with Vinegar
Vinegar is one of the best natural cleaning products for around the house. It has so many uses, and is very cheap. In our house, we go through it faster than milk! It's effective against bacteria, mold, mildew, and even some insects!
Here are some tips and uses I've collected over the years. (All of the following are for distilled white vinegar, unless otherwise stated.)
- Keep a spray bottle of 1 part vinegar to 4 parts water handy. Use for wiping down countertops, tables, stovetops, and any other surface you'd use Lysol or something similar on.
-Spray full strength around window sills, doorways, and anywhere else you see a trail of ants. This kills their scent trail.
-Mix 1 cup vinegar with 1 gallon warm water and mop linoleum or no-wax vinyl floors. (Test on a hidden area first.)
- Add 1/4 cup to the rinse water in your steam cleaner to help take up the soap.
- Add 1/2 cup to the rinse water in your washing machine to help soften clothes. Use instead of fabric softener.
-Add 2-3 cups to your washing machine and fill with hot water. Run an empty cycle. This helps clean the soap scum out of your washer.
- Apply full strength to bath tubs to clean soap scum off of it. Works with sinks as well.
-Pour 2 cups into toilet bowl and allow to sit over night. Brush and flush for a clean toilet.
-Add about 1/4 cup to a sink full of hot water to disinfect baby toys.
-Soak bottle nipples in a vinegar solution to kill the bacteria that causes thrush. If nursing, soak bras in vinegar/water mixture before washing.
-Use a mixture of 1/2 water and 1/2 vinegar to clean windows. Use a lint free cloth or newspaper to wipe.
-Add 1 cup of vinegar to to water resevoir in your coffee pot, and fill with warm water. Run the cycle. Discard the vinegar water, and run 2-3 more cycles with clean warm water. This will help remove any build-up in your coffee pot.
-Spray undiluted vinegar onto weeds. Be careful as this will kill grass, plants and flowers as well.
There are several other uses, but these are my most frequent!
Subscribe to:
Posts (Atom)